April 15, 2013 - 4:14 pm
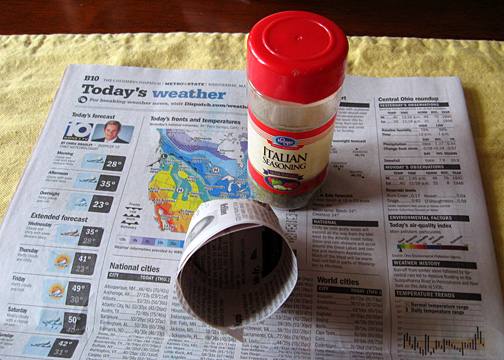
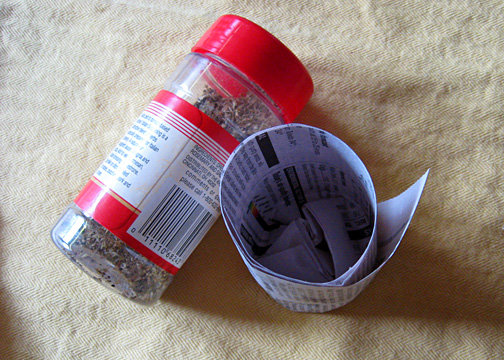
For a while now I’ve wanted to make my own newspaper seedling pots, and I wanted one of those wooden pot makers because I thought I had to have one to do it. And then I realized that I don’t need some silly single-purpose item sitting around my house, because I could make the little pots all on my own with what I have on hand: a plastic spice jar. It’s not as ‘pretty’, but it’s functional and does the trick!
What you’ll need: a spice jar, some newspaper, and a pair of scissors. That’s it! Easy peasy, right?
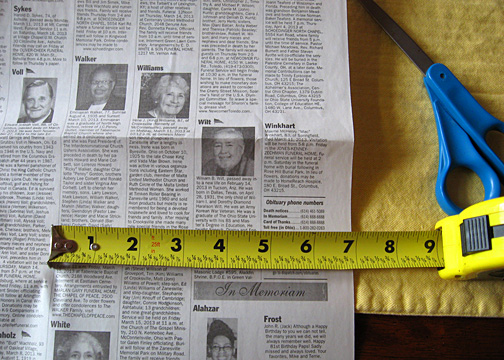
You’ll want to cut your newspaper into strips about 3.5-4″ wide. The obituaries section of the Dispatch happened to be the first page I grabbed from my garden newspaper pile, and since it already has lines printed between the colums I just cut the paper into not-exact 3rds, with two columns on each strip. The middle section, for example, is a little over 3 inches, but the last two columns are a little under 4″. It doesn’t have to be perfect, it just can’t be too narrow, since you’ll want overhanging paper for the bottom of your pot.
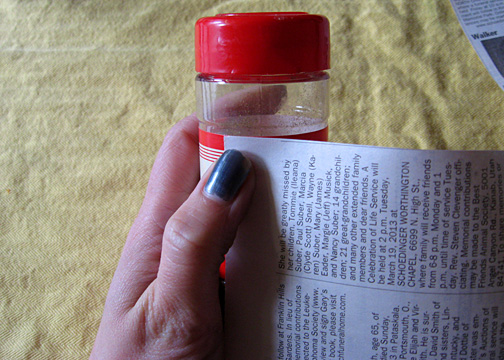
Find a spot on your spice jar that leaves paper hanging off the end, and then wrap the paper around the jar a few times until you get to the end of the paper strip.
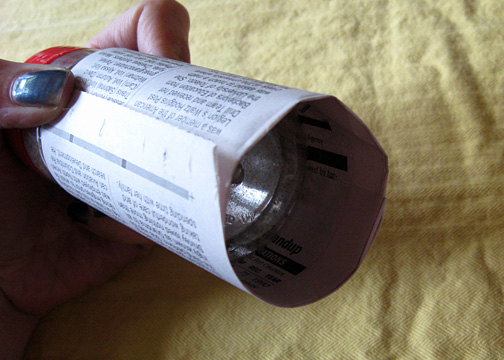
See what I mean about overhanging the paper? From here you’re going to fold those ends down.
I first fold down the area where the wrapped paper ends on the outside, then I move opposite that spot and fold it down on top of it. This helps keep the paper from unrolling, since you’re securing the outside edge first.

Then fold the last two areas down, flip the whole thing over and tamp the spice jar down a bit to help crease and secure the newspaper. The ends won’t stay folded down, but we’ll fix that in a bit.
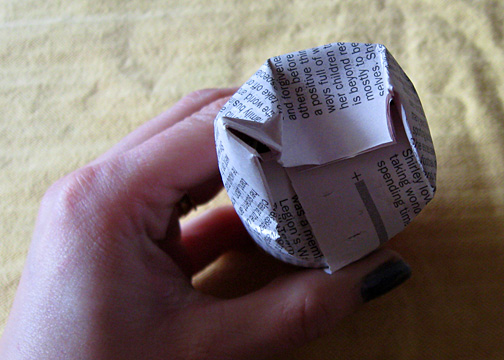
Gently remove the spice jar from your newspaper, and ta-dah! Newspaper seedling pot! If it won’t stand because the ends keep flipping out, you can do a couple of things to fix it. The obvious solution is tape, but since these pots are plant-able and will naturally compost/degrade you don’t want to use something that isn’t biodegradable. What I like to do is push the ends up into the center of the pot, and then readjust them so there’s not a hole for soil to escape in them. Then it should sit nicely.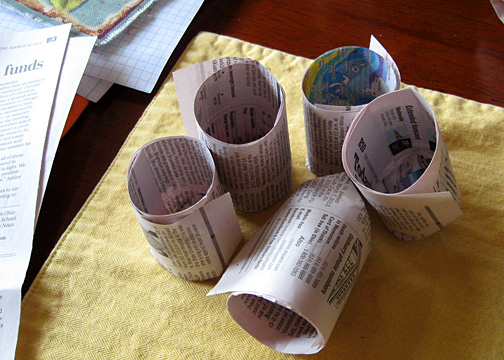 From here, carefully fill the pots with your soil of choice and plant your seeds! The newspaper will naturally break down over time, but they shouldn’t break down before you get a chance to plant your seedlings outside. And if you happen to need bigger pots as your seedlings grow larger, cut a larger piece of paper and use a drinking glass or some other, wider item to make your pots using the same method.
March 18, 2013 - 11:52 am
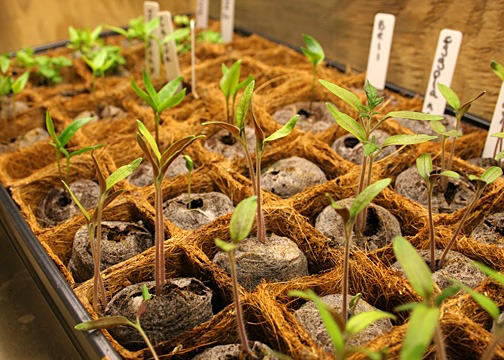
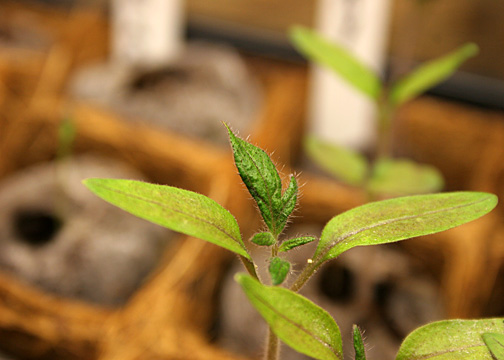
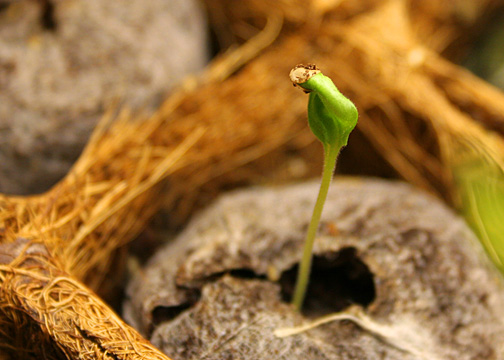
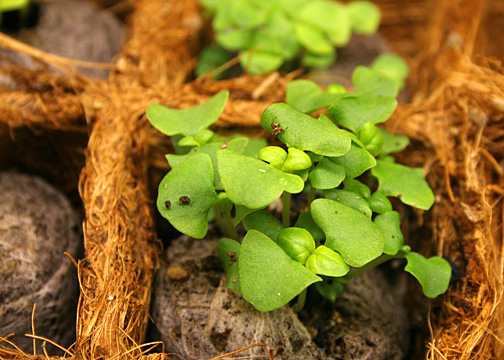
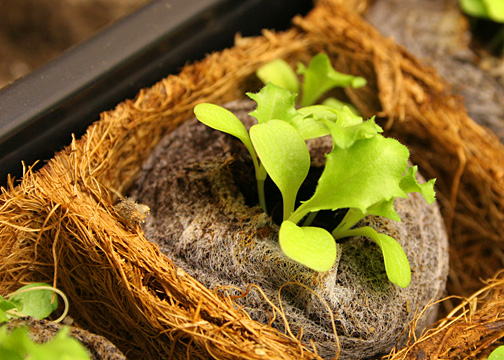
A month ago (February 16th) these coconut pots were just empty little plantable shells. Now they’re full of life! Everything needs thinned out – I have multiple tomatoes growing in the same pot, and the same goes for my peppers. The tomatoes are beginning to show their ‘true’ leaves, as are the peppers though they’re still too tiny to get a good picture of. The basil is also starting to show ‘true’ leaves and is also starting to get a bit taller after spending the last few weeks hugging the dirt a bit. My eggplant has finally germinated and sprouted (and, of course, it sprouts after I already acquired new seeds to plant out of fear that my seeds were past their expiration). And the endive… well, I’m not quite sure what to do with it. I’ve never had endive before, nor have I grown it, so I guess I should do some research and figure out what to do now.
Not sure how you’d get your seedlings started indoors? Here’s my not-at-all-fancy set-up:
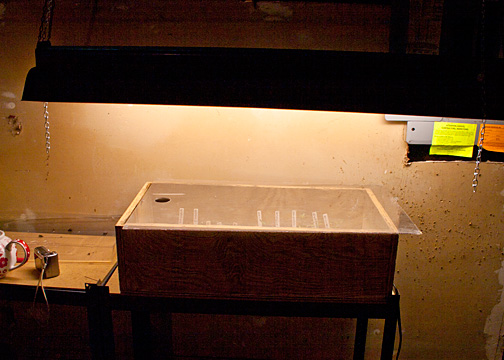
There are multiple ways you can get your seedlings started and some of them are ridiculously priced (and I don’t have $400 to blow just to grow my own veggies), but what works for me is the above. Seedlings need a lot of light, which is something we don’t have enough of this time of year. The fluorescent light provides the light needed for the seedlings, and having it adjustable on chain means you can raise and lower it as-needed. You’ll want your light just above your seedling tray so your seeds don’t get too tall/stringy trying to reach for the light. As the seedlings grow taller you’ll raise the light a bit higher.
Seedlings also need warmth to germinate, which is hard to come by in a cold basement (or, you know, in Ohio in the winter). That’s where a heat mat comes in handy. On the right side of my set-up you can see a cord hanging out the side – that’s where my heat mat comes out of the box to be plugged in. The wood box and plexi-glass top itself isn’t necessary, but my dad made it for me so it’s what I use. You can use those plastic set-ups at the store that are a black tray and a clear plastic top that basically creates a warm, humid greenhouse for your seedlings.
In all, you can put together your own seedling set-up for not a whole lot of money – even if you buy everything new. You can sometimes find the fluorescent lights at garage sales on the cheap, but I’ve priced out new ones for a future second set-up and Lowes has a 48″ plug-in light for $17.98, plus your cost of bulbs and chain to hang it. The grow mat/greenhouse tray I think was about $25ish? And once you’ve made the investment you’ll have equipment that will last you year after year to start plenty of seedlings for your garden. The seedlings we grew the first year paid us back for the investment when you consider the cost of buying garden plants from a nursery or garden center.