January 3, 2015 - 9:08 am
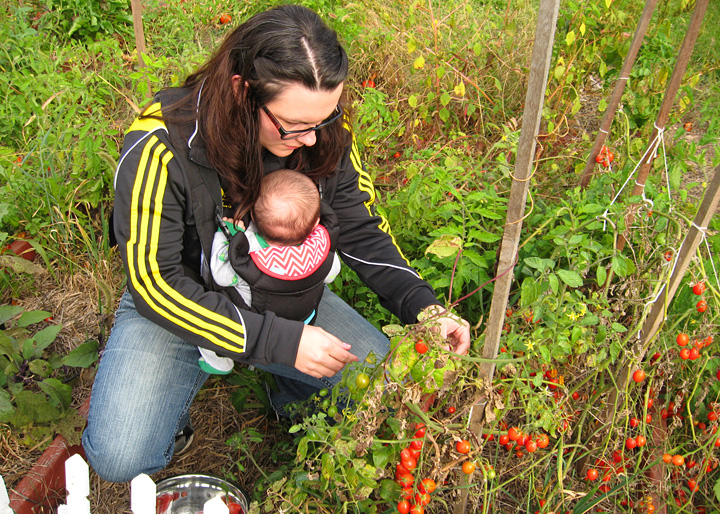
Hiya friends! I know it’s been a good, long while since I last posted. I don’t even remember what happened back in 2013 after that canning post, but I know for sure that 2014 was kind of a waste gardening-wise. There was a garden, but we only grew about half our usual because we had a baby due in August (prime tomato canning season) and I didn’t want to be fat and pregnant and awkward out there trying to weed and such. As it was, by October we had a monster amount of tomatoes to pick before we ripped everything out.
What to do with a new baby and a garden that needs tamed. Multi-tasking for the win!
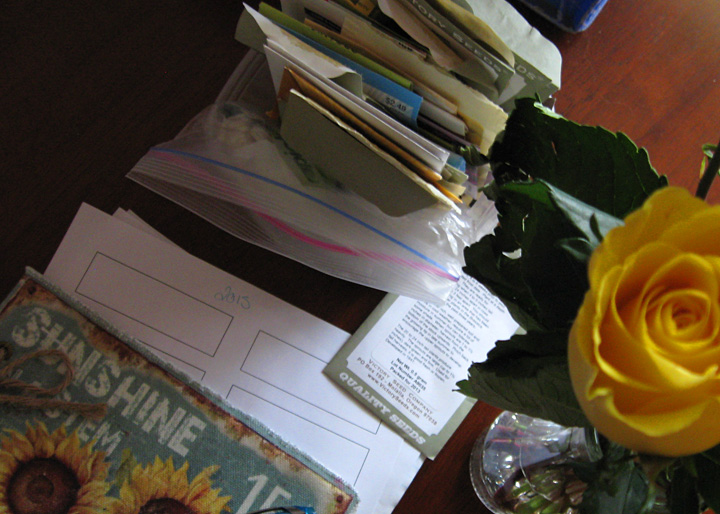
So now that the new year is here, it’s time to start planning the upcoming garden. Charts get made, seeds get ordered, and our rigged grow box gets the cobwebs dusted off and ready for use for seedlings.
Our planning process goes a bit like this:
- Take inventory of seeds to see what we have, what we might need to order, etc
- Look at last year’s planning chart to see what we planted where (our garden is divided into quarters, and each year we rotate the whole layout so nothing gets planted in the same place as the previous year)
- Map out this year’s garden with our “must plant” items.
- Fill in the empty/free spaces with our “like to try” plants.
- Order seeds.
This year we had to order new brandywine seeds, as well as a paste tomato. The San Marzano tomato seeds I purchased at Menards ended up being… well, tiny. That’s what I’m picking in the photo above. There was NO WAY I was going to try to peel all those tiny tomatoes to make sauce. Nope. Not going to happen. New(ish) this year, we’re going to try brussel sprouts. I attempted to grow them from seed last year and then I let them die in the grow box in the basement. Oops. So we’ll try them again this year. Also, tomatillos, because I LOVE roasted tomatillo salsa. That with some homemade corn tortillas… Mmmmm mmmmm!
What are your gardening plans this year? Are you trying anything new? Do you have a favorite standby that you plant every year?
July 8, 2013 - 1:55 pm
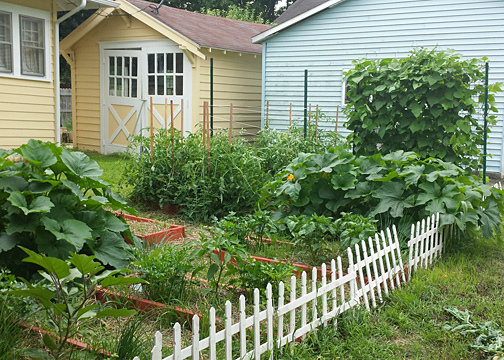 Is everyone else tired of the rain? I mean, I’m not complaining… much. Check out our garden! Clearly the rain has been fantastic for the veggies! Just a month ago the beans were barely climbing the trellis, the zucchini and squash were a fraction of their current size, and everything just looked so small. Now look at it! Organic gardening FOR THE WIN!
Gardening is a lot of waiting. You wait until the frost date to plant. Then you wait for the seeds to germinate. Then you baby them with water and weed a bit while you wait for everything to grow. Wait, wait, wait. So much waiting, but when things finally start producing delicious, tasty home-grown food WATCH OUT. You’ll have more on your hands than you know what to do with.
I’ve been severely slacking on the updates, but here’s what’s going in the garden currently: We had our first harvest a few weeks ago with the bed full of radishes. And, of course, I forgot to tally up the total weight of the harvest. Last week we picked about 6 zucchini totaling in around 1.9 lbs with more zucchini on the way! Already I’m feeling a bit ‘done’ with zucchini, so I’m going to have to start getting creative with how I work it into our meals. I found 3, maybe 4 little bitty acorn squashes growing, with plenty of blooms for more. Peppers, beans, and eggplants are all blooming, and we have quite the haul of green tomatoes with more blooms coming. Oh, and cucumbers are blooming like crazy with lots of teeny tiny cukes!
We planted Sugar Baby watermelons in the box between the zucchini and tomatoes, but you can’t tell because they’re taking their sweet time growing. I swear those things sat in the box with their two “true” leaves for a month before I saw any more growth. I’ve never tried growing melons before, so we’ll see if we end up with any this year. If not then I might just have to find something else to plant next year in that spot instead.
I’ve added a new page for the garden harvest tally, so you can see, too, how much food we’ve raised from our little city lot!
March 31, 2013 - 11:18 am
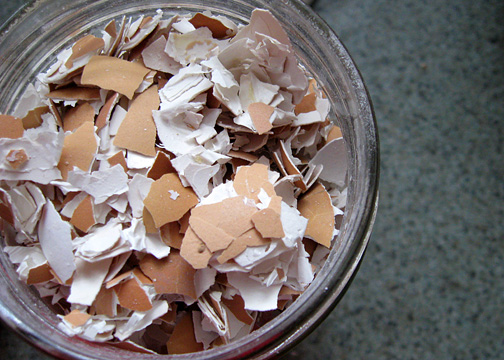
Well, it’s Easter Sunday, which means a lot of people out there have probably dyed eggs for the munchkins to hunt, and you’ll now be eating eggs until you’re sick of them for the rest of the week because aforementioned munchkins won’t eat them. At least that’s how it worked in my house as a kid.
Now is a good time to start saving those egg shells for your garden! I rinse mine to get any leftover egg white out of the shell, and then I set them aside to dry before I throw them in an re-purposed salsa jar and give them a shake to crush them up a bit. Then they’re popped into another, bigger re-purposed salsa jar to collect until I have enough for the upcoming year’s garden.
Use your shells when you plant your tomatoes and peppers (and eggplant, if you grow it!)- just sprinkle some into the hole before you set in your plant. These plants need calcium and a lack of it can cause what’s known as blossom end rot (BER). And let me tell you, BER can make for some really disappointing harvests. We’ve had years where we’ve had more bad tomatoes than good, and when you’ve spent hours and hours tending your plants and weeding a bad harvest can be heartbreaking. Planting shells with your plants gives them a calcium source right where they need it, and as the shells break down your plants will suck up calcium for use in producing fruit.
If you have a problem with slugs, you can use your eggshells to sprinkle around your plants to keep the pests away. The sharp edges of the shells act as a deterrent to them since they don’t like crawling over sharp or jagged things.
I’ve heard, but not tried yet (we don’t boil eggs often), that you can take the water you boiled your eggs in and use it to water your calcium-loving plants. Obviously you need to let the water cool so you’re not pouring boiling hot water on them! Boiling eggs is supposed to leave you with water fortified with calcium, so rather than dump that water down the drain why not feed your plants?
And, of course, you can always just throw them in the compost bin to break down with all the other organic scraps, giving you a well-rounded fertilizer for your plants.
Want more ideas on how to use those eggshells instead of throwing them out? Check out The Prairie Homestead’s list of 30 things you can do with egg shells (some of which even this Earth lover won’t attempt…Eggshell membrane bandage? No thanks!)
March 18, 2013 - 11:52 am
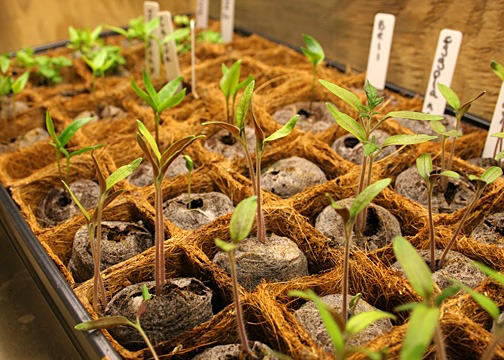
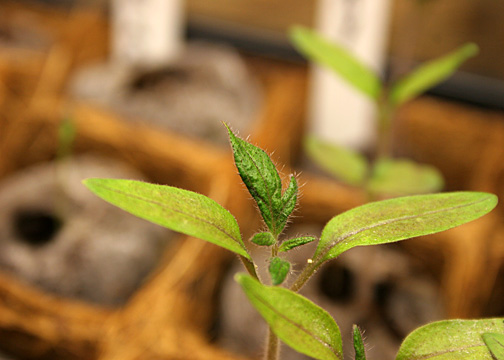
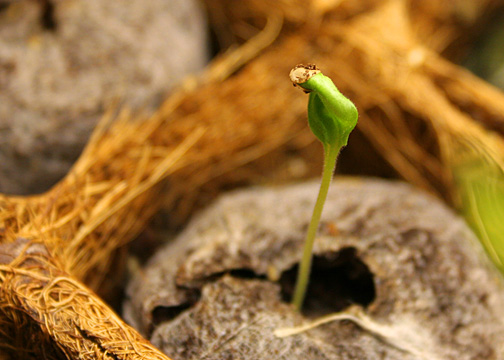
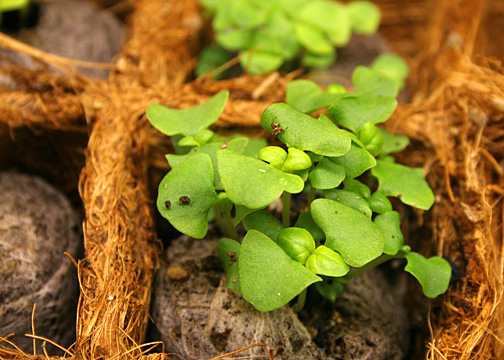
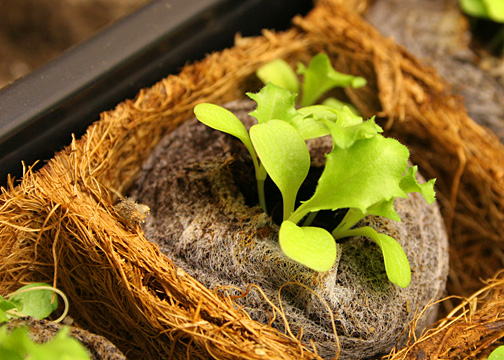
A month ago (February 16th) these coconut pots were just empty little plantable shells. Now they’re full of life! Everything needs thinned out – I have multiple tomatoes growing in the same pot, and the same goes for my peppers. The tomatoes are beginning to show their ‘true’ leaves, as are the peppers though they’re still too tiny to get a good picture of. The basil is also starting to show ‘true’ leaves and is also starting to get a bit taller after spending the last few weeks hugging the dirt a bit. My eggplant has finally germinated and sprouted (and, of course, it sprouts after I already acquired new seeds to plant out of fear that my seeds were past their expiration). And the endive… well, I’m not quite sure what to do with it. I’ve never had endive before, nor have I grown it, so I guess I should do some research and figure out what to do now.
Not sure how you’d get your seedlings started indoors? Here’s my not-at-all-fancy set-up:
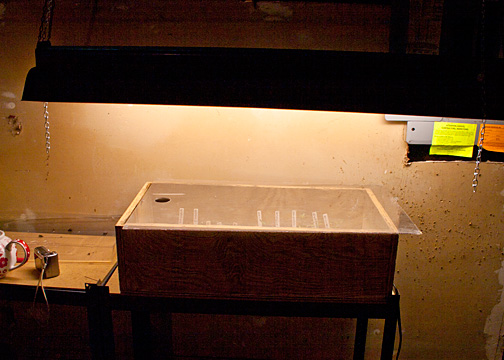
There are multiple ways you can get your seedlings started and some of them are ridiculously priced (and I don’t have $400 to blow just to grow my own veggies), but what works for me is the above. Seedlings need a lot of light, which is something we don’t have enough of this time of year. The fluorescent light provides the light needed for the seedlings, and having it adjustable on chain means you can raise and lower it as-needed. You’ll want your light just above your seedling tray so your seeds don’t get too tall/stringy trying to reach for the light. As the seedlings grow taller you’ll raise the light a bit higher.
Seedlings also need warmth to germinate, which is hard to come by in a cold basement (or, you know, in Ohio in the winter). That’s where a heat mat comes in handy. On the right side of my set-up you can see a cord hanging out the side – that’s where my heat mat comes out of the box to be plugged in. The wood box and plexi-glass top itself isn’t necessary, but my dad made it for me so it’s what I use. You can use those plastic set-ups at the store that are a black tray and a clear plastic top that basically creates a warm, humid greenhouse for your seedlings.
In all, you can put together your own seedling set-up for not a whole lot of money – even if you buy everything new. You can sometimes find the fluorescent lights at garage sales on the cheap, but I’ve priced out new ones for a future second set-up and Lowes has a 48″ plug-in light for $17.98, plus your cost of bulbs and chain to hang it. The grow mat/greenhouse tray I think was about $25ish? And once you’ve made the investment you’ll have equipment that will last you year after year to start plenty of seedlings for your garden. The seedlings we grew the first year paid us back for the investment when you consider the cost of buying garden plants from a nursery or garden center.
March 3, 2013 - 9:46 pm
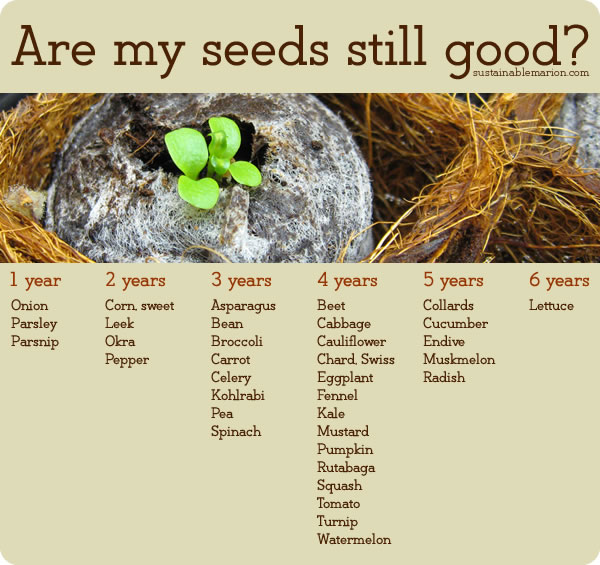
Did you know that seeds have a ‘shelf life’? I didn’t know that for the longest time, and for a while just figured that my veggie seeds weren’t germinating because I had done something wrong. As it turns out, the shelf life of my seeds were well past expired (and, okay, I probably didn’t store them in ‘ideal’ conditions, either).
How do you know if your seeds are still okay to plant? If you’ve purchased those little seed packets from the store (Lowes, Walmart, etc), take a look at the back. You should be able to find what year the seeds were packed for. 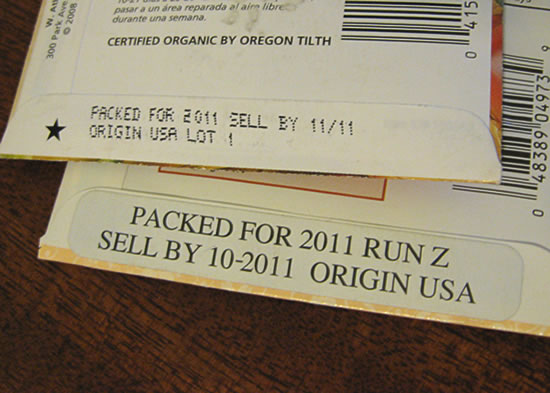
Now it gets a little tricky here because a seed packed for a certain date (2011 for my Hillbilly tomato and California Wonder bell peppers) doesn’t necessarily mean that my seeds are only 2-3 years old. Who knows how long those seeds sat around before they were packaged for sale? For all the consumer knows, those seeds could have sat around for quite a while. If you’re having trouble with your seeds not doing anything, this date is a decent clue into how old your seeds are.
If you’re a smartypants you probably save seeds from your garden each year, giving you a free supply of seeds for next year’s garden. When you’re tucking away your seeds to store for next year write down the year those seeds were harvested. That way, if you decide to take a year or two off from growing, let’s say, cucumbers because you ended up sick of them after a bumper crop, you can come back to your seed stash two years later and know exactly what year you saved those seeds and if they’re still viable.
Some seeds last longer than others, so here’s a handy little chart I threw together (based on information found from the Iowa State University Extension online) to help keep this seed shelf life business straight: